HOW TO – GPU servers’ rental
1.
Booking servers
2.
Accessing the remote machine
3.
Workflow & File Transfer
4.
Finishing your rental
1.
- Booking a machine
Send us an e-mail with some basic informtion stated below so we can start the GPU servers’ booking process.
- what configuration of remote machine are you interested in
- how many servers do you need
- when you want to start the rental and for how long you need to have access to remote servers
If you need help with estimating the necessary rental duration and servers’ configuration please write us additional informtaion about your project
- how many frames you need to render
- what is the average render time per frame using your GPU/GPUs
- what GPU/GPUs were used for the above estimates
- what 3D application, renderer and plugins are used for the project
When we have all the above information we can estimate your needs and prepare a suitable GPU servers’ rental offer
It is best to plan your workflow with remote machines and book servers as soon as you know when you need them. The sooner you book the bigger possibility of machines availability.
2.
- Accessing the remote server
Access to machines is granted around 15 mins before your rental is to start. As a standard we recommend using Anydesk or TeamViewer as an application for connecting to and managing the remote machine. Both applications are free to use in their basic versions and have all functionality we need.
In a separate email you will be sent ID and password of your session on a remote server .
After you log in to the GPU remote server the workflow is similar to using a local PC.
To start working using your chosen 3D application you would need to install the software like on a regular workstation. As a standard systems are offered with Windows x64 OS.
Autodesk Maya, Softimage, 3ds Max, Maxon Cinema 4D, Blender and many other Windows OS compatible applications can ofcourse be installed. We have tested our machines with render engines like Redshift3D, Octane, Thea+Presto, Cycles, FStorm render and Arion.
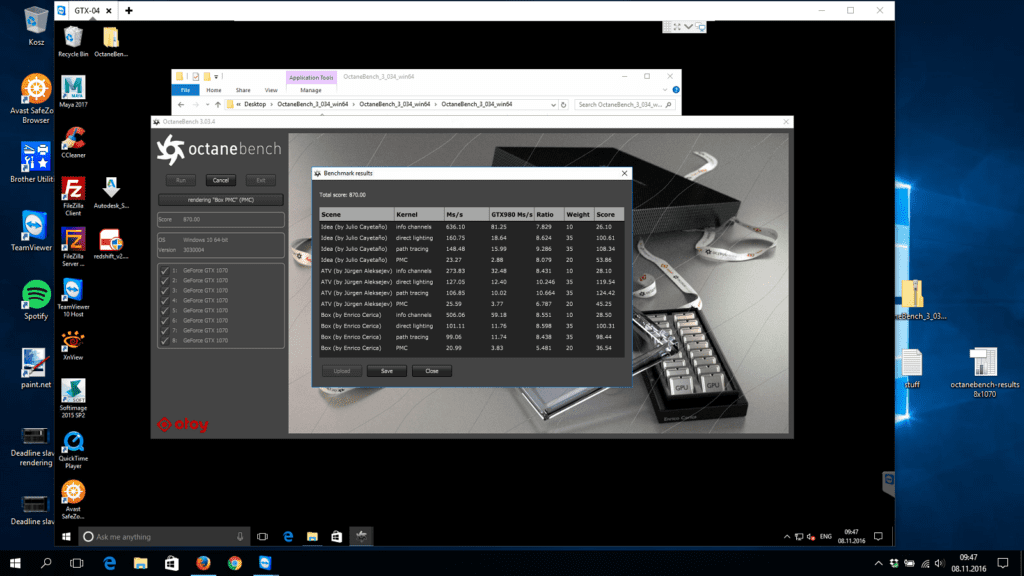
On the image below you can see an opened connection to a remote server using TeamViewer. It is that simple. Remote machine’s desktop can be seen as opened window on a local PC’s desktop. Work on a remote server can be done in full screen mode as well.

Remote connection to GPU server
3.
- Data transfer
- Google Drive / Dropbox / other similar services.
- You could auto-sync files via gdrive / Dropbox.
- Sharing a folder on your server for google sync might not be ideal (eg, sh aring the root folder of a large project will involve syncing potentially large amounts of data to the cloud).
Easiest way to transfer data to a remote server is simply uploading all your files to a cloud storage solution like Dropbox, Google drive before the rental starts. this way after you access the machine you simply need to download your files to remote servers’ location. You can do it using direct links or ofcourse install the Gdrive or Dropbox application on the remote machine. Choosing this option also gives you two additional advantages over a traditional FTP file transfer:
- you do not have to waste your rental’s time and wait untill files are uploaded, you have done that earlier
- you can use Dropbox / GDrive folder as your work’s output folder, this way it will automatically sync with your local PC – no time wasted to download rendered images after the work is completed, all syncs on the go
Additional File Transfer options
There’s a few ways to go about moving files back and forth between your office and UltraRender. These are some alternatives which are worth considering:
- Cloud hosted FTP.
- Easy to setup, but very manual to manage as you need to copy each file twice (once to the cloud, then once to your office).
- Locally hosted FTP.
- Can more easily copy between the two locations as you only need to perform the copy once.
- However this opens up a security risk on your server which you need to manage.
- Direct drive mapping through windows.
- It is entirely possible that you can map your local server as a Windows network drive.
- it can be slow.
- You could map your FTP share through Windows.
- TeamViewer built in data transfer tool
4.
- Closing the remote connection
When you set your software environment on the GPU server, run your renders (or any other jobs) and finish using the remote machine simply close TeamViewer application. All jobs will continue to run on the remote machine.
5.
- Finishing the rental
Before you finish your rental please do not forget to transfer all your rendered images or other work results to your local workstation. If you forget to deactivate your licenses do not worry, after your rental finishes we always double check it and if necessary deactivate it for you. We also wipe all your personal data from the remote machine.
